Scott Hanselman posted a video earlier this month that gave me an idea. He showed how he used OBS studio and Microsoft Whiteboard to do a transparent glass whiteboard in Microsoft Teams and I saw in it an interesting way to use my reMarkable tablet to do something similar.
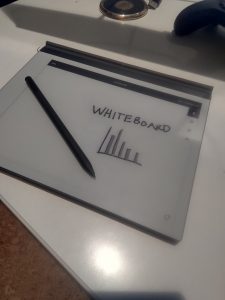
Working from home, like many of you my primary device for work is a desktop computer which does not have the drawable surface and pen of a Microsoft Surface device. Recently, I got the new reMarkable 2 paper-like tablet and I really like it. The device works with a dedicate desktop app that, in addition to helping synchronize notebooks, it has a Live View capability where the display on the computer is in sync with the tablet and update every time the page on the tablet drawn on. I was able to take the live output from the reMarkable app on my PC as an input source in OBS Studio and replicate the transparent glass whiteboard effect that I could use during Microsoft Teams meetings. If you aren’t familiar with it, OBS Studio is a free, open-source application for Windows, macOS, and Linux that you can use to stream and record from your computer, mixing video, desktop windows, audio sources, and graphics. Here is how I did it:
- On my reMarkable 2 tablet, I added a new page to a notebook, using the blank page template and set the orientation to landscape.
- On my PC, I started the reMarkable app
- On my reMarkable tablet, I turned the LiveView (Beta) option on in the share menu
- Once I did, that I was prompted on the app on my PC to accept the LiveView request. At that point, the app’s screen mirrored my tablet.
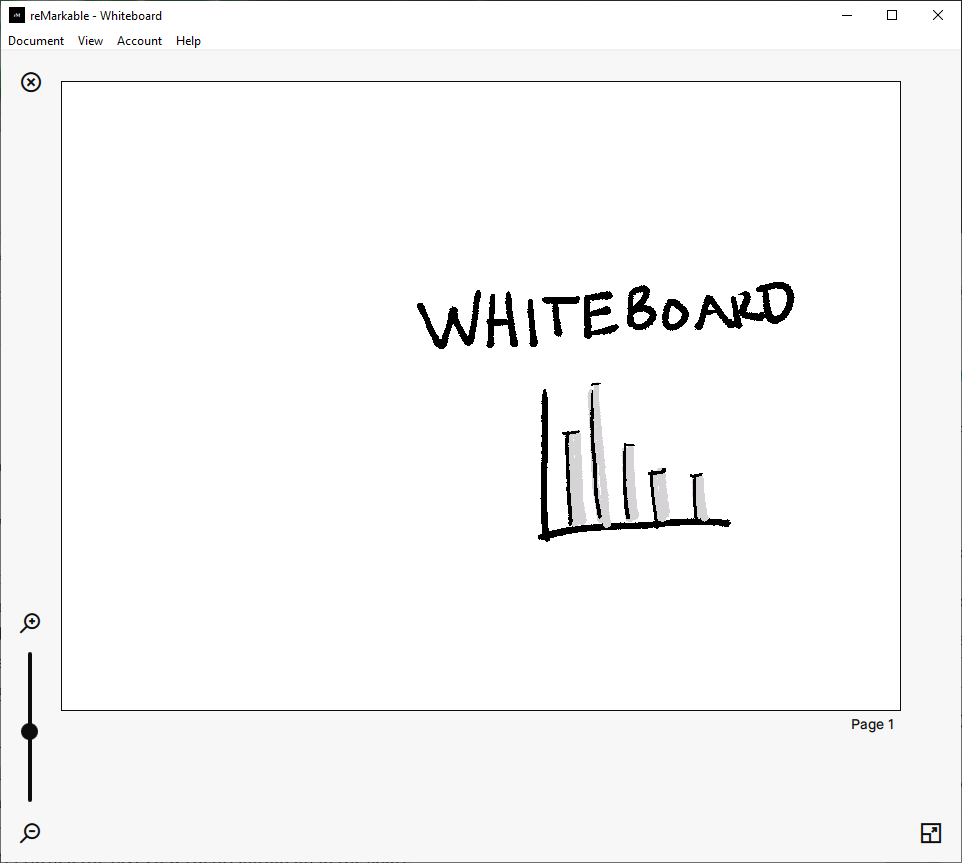
- In OBS Studio, I added a Video Capture Device for my webcam and stretched it to the size of the screen output.
- I then added a Window Capture source, selecting the reMarkable app as the Window.
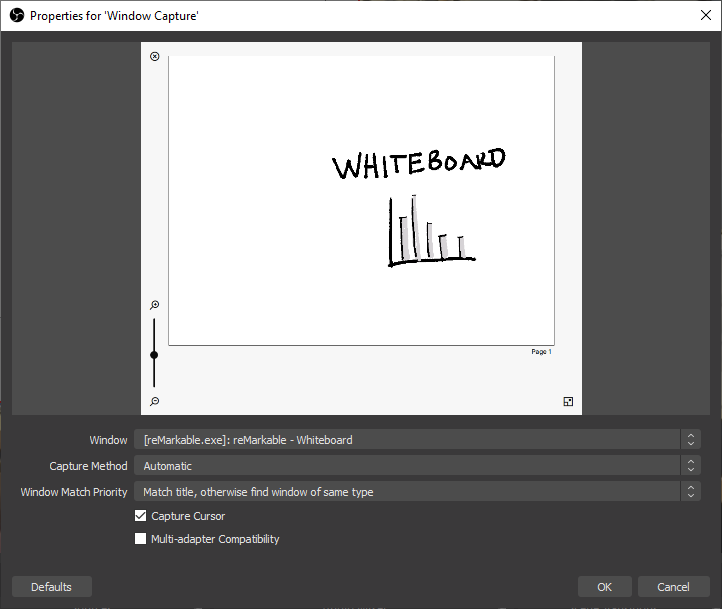
- Now the whiteboard is positioned over the video capture device. Before I resize it, I need to crop the edges.
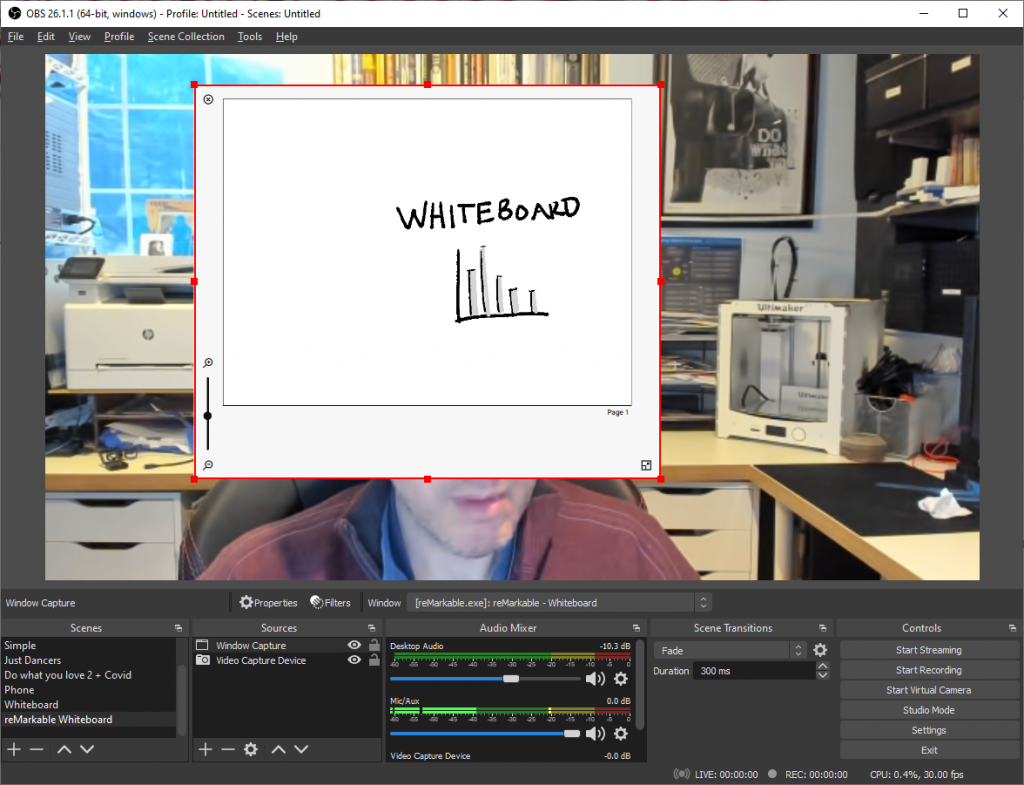
- I drag the edges of the new Window Capture element with the Alt key pressed to crop out the frame and chrome around the whiteboard.
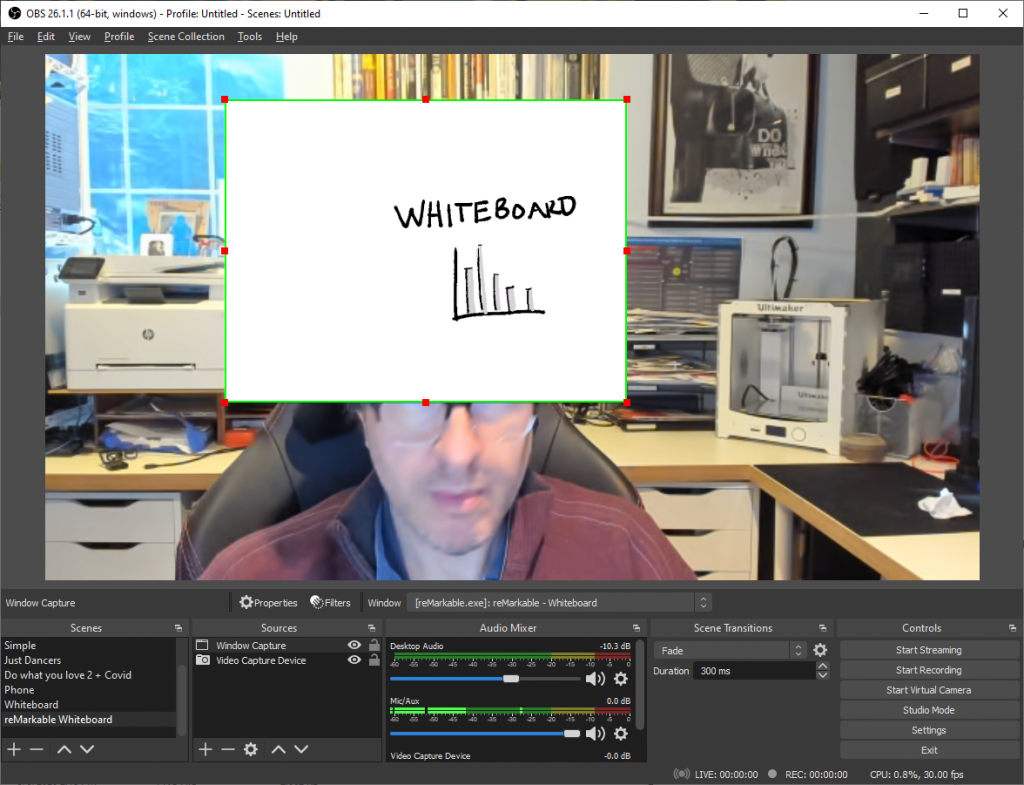
- Now I resize the whiteboard so it covers my Video Capture Device.
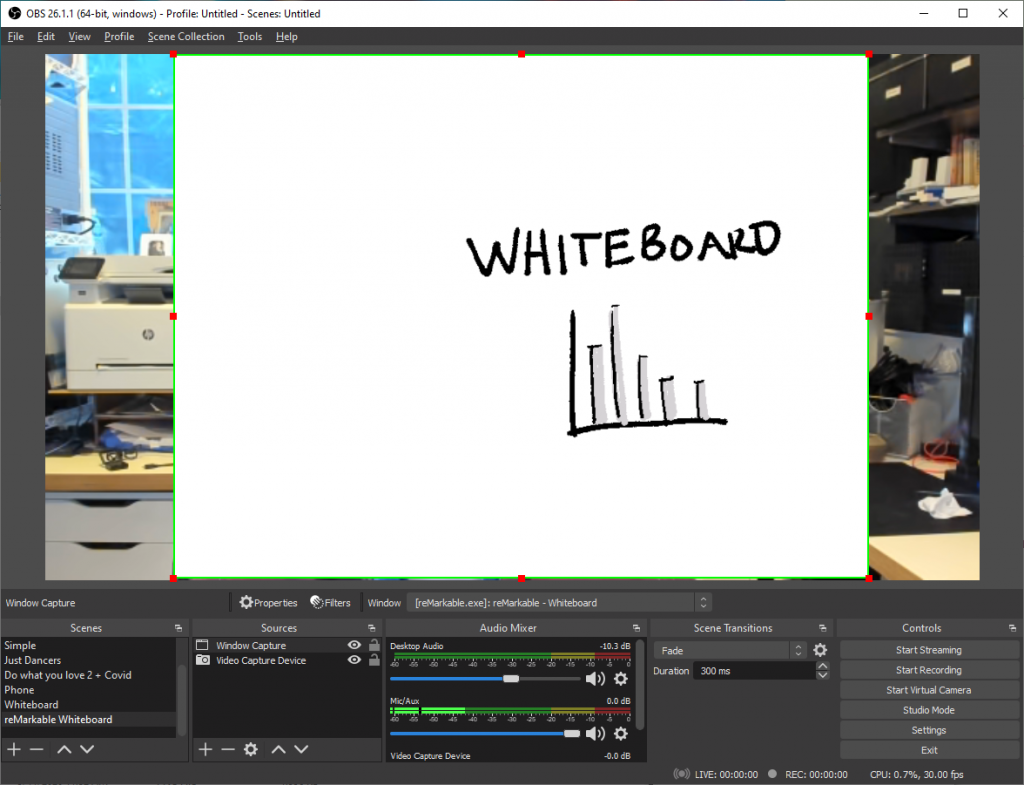
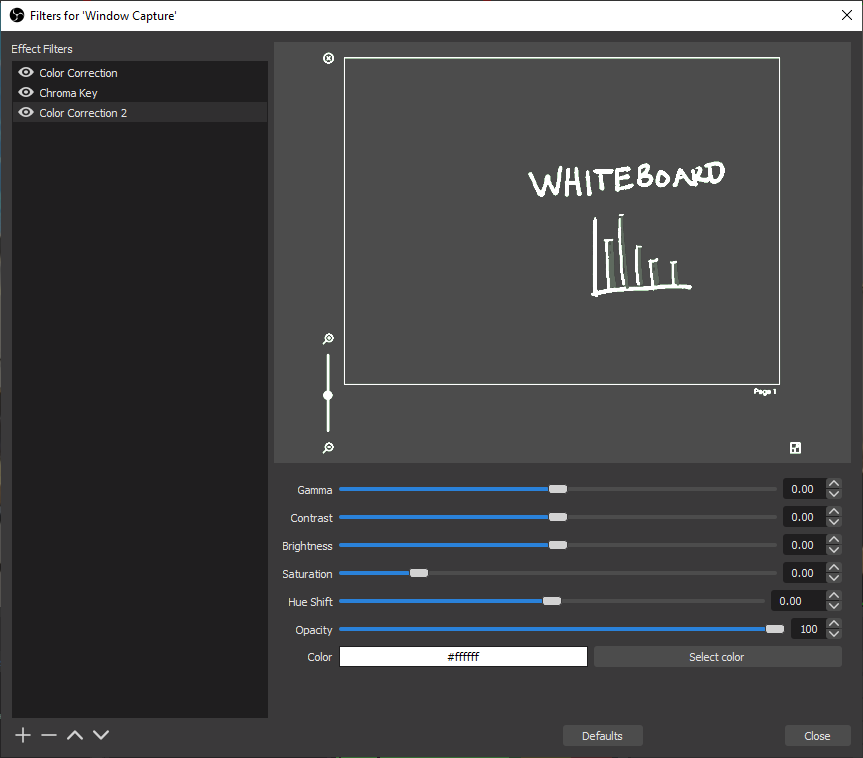
- The last thing I do is add filters to the Window Capture to make it all work. Select the Window Capture source, right click and select Filters…
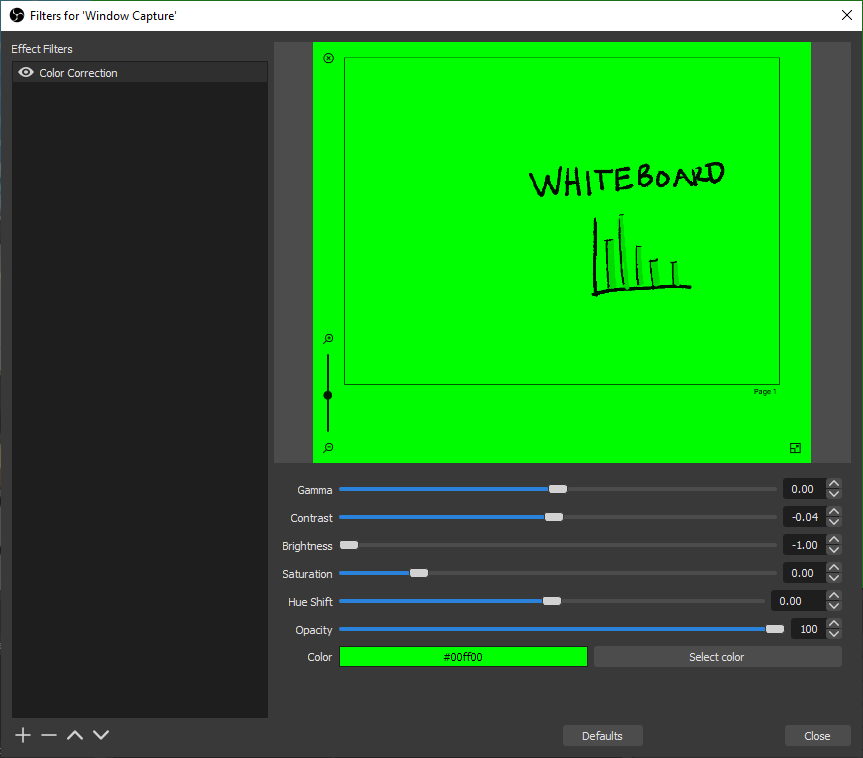
- Add a Color Correction filter to make the white background green.
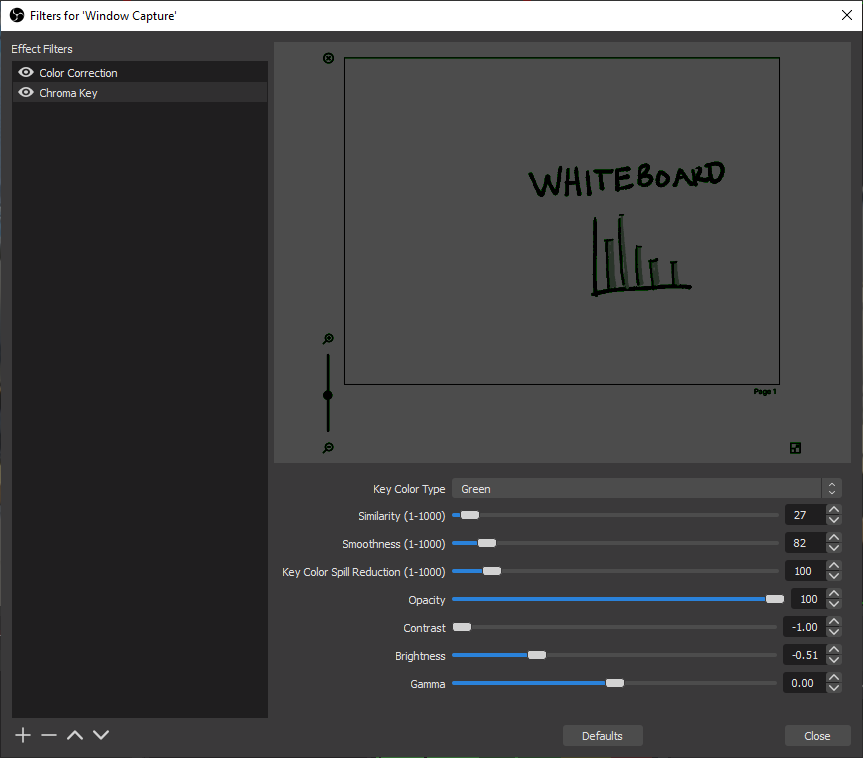
- Add a Chroma Key filter to remove the background. You may need to adjust the Similarity value if you use gray pens on the reMarkable.
- Add another Color Correction filter to make the black text white.
And then you can stream, record, or use OBS as a Virtual Camera in your online meetings. The whiteboard drawing from your tablet is saved and you can easily export it to a PDF or image and it is in the video as well.
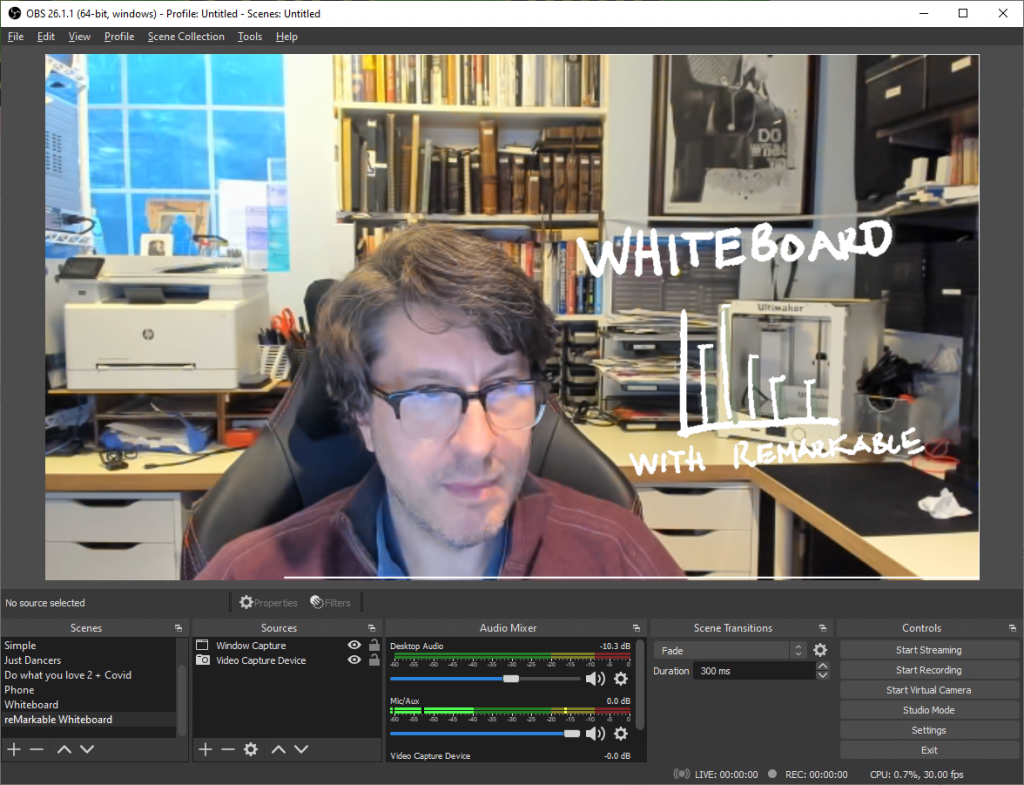
Give it a try today and add more drawing to your online meetings!
Limitations
Some users have pointed out a limitation to the LiveView (Beta) feature in the reMarkable app where erasing on the tablet does not immediately erase on the LiveView. A quick fix to refresh the LiveView is to tap the Full-screen button in the lower right corner of the app to make the app go full screen, and then tap it again to go back to the original size. This triggers a refresh of the LiveView with the erased ink. I reported this bug to the reMarkable team.

This is super cool! Do you have to set it up again every time or can it recognize / save the settings every time you connect your rM?
The setup in OBS Studio is saved but you have to start the Live View Session again.
C’est juste géant ! Waou ! Merci pour l’astuce !
This is fantastic! Thank you for the detailed instructions. I learned more than I expected, and for that I’m very grateful 🙂
I must have missed something because it works when I write/draw but when I erase, it is removed from the remarkable but remains on the shared screen overlay.
It looks like that is one of the limitations of the LiveView as it is still a Beta feature. Zooming in and out looks on the LiveView looks like it triggers a refresh.
Another reason to get a remarkable, this is cool!
Strangest thing happening… when I capture the Window for the ReMarkable Screen Share I see it on the screen, but no new writing makes it over to OBS. It is indeed making it to the Desktop ReMarkable Screen Share, but the capture window in OBS doesn’t change.
If I put the Screen Share on my 2nd monitor and capture that as an OBS input, I see the new writing appear in OBS. Something fishy happening… thanks for your article.
Barry,
I just checked it and was able to get it working – nothing special.
1. Started screen sharing from Remarkable
2. Started OBS and pointed full-screen recording at the screen where the Remarkable window is.
3. I see the writing in real-time in the OBS preview.
It might be a video driver issue.
Best of luck. I hope you are able to get it working.
Thanks for posting!
Michael
Window capture currently broken, only display capture working. If you are on a single monitor this gets tricky, you have an option in settings to hide OBS from the display capture. I have contacted support
I am experiencing the same with OBS 30.1.2 and reMarkable for Windows 3.10.0 (845) – my reMarkable is on latest firmware also 3.11.3.3.
Why not just Share the Remarkable Screen Share window from the Share button in Teams? You don’t need any extra capture software.